Support -> How To Create a Newsletter From a Previously Sent Newsletter
How To Create a Newsletter From a Previously Sent Newsletter
Step 1. Enter the "Create Newsletter" Section
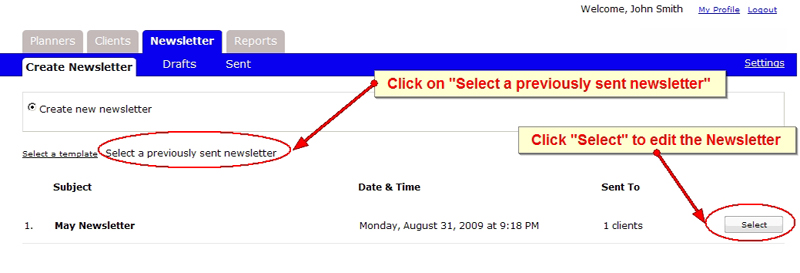
After selecting the "Newsletter" tab in the work area, select the "Create Newsletter" tab.
Step 2. Select a Previously Sent Newsletter
You can find a list of previously sent Newsletters by clicking on the "Previously Sent Newsletter" link.
Then, select the Newsletter you want to edit by clicking on the "Select" button next to the desired Newsletter.

Step 3. Edit the Newsletter
Under the "Newsletter Editor" section of the page, you may edit the various sections of your Newsletter
simply by clicking on the desired section.
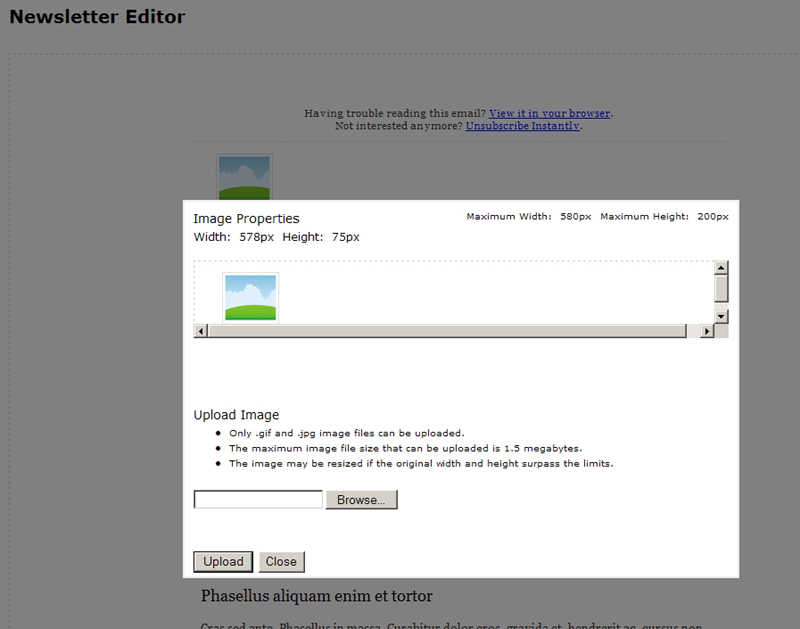
You may add a picture by clicking on the image icon. A new window will appear. Click on the browse
button in order to select an image from your hard drive. Note that only gif or jpg type image files can be
uploaded and that the image must be 1.5 megabytes or smaller. Once you have select the desired image, click
on the "Upload" button. You will then return to the Newsletter Editor page.

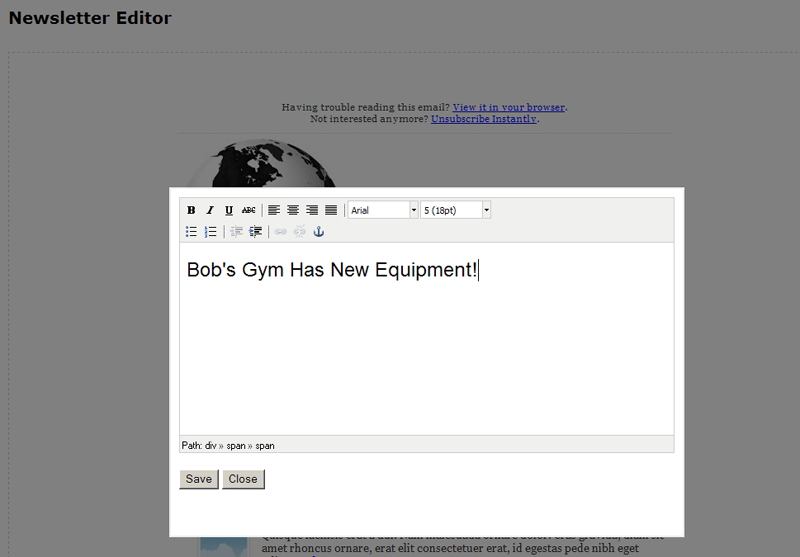
You may also edit the date, header, and main text by clicking on the appropriate section. When you make a
selection, a text editor will appear where you will be able to enter text and change its font type, font size,
and appearance.
You may repeat Step 3 for all the rows in your Newsletter. When you are done, click on the "Save" button to
return to the "Newsletter Editor" page.

Step 4. Select Your Mailing List and Send
Once you have created your Newsletter, you must select the clients to whom you wish to send the Newsletter by
creating your mailing list (refer to "How to Create a Mailing List for a Newsletter" for more details). You
may then save your Newsletter, send it, or delete it. Don't forget to enter a Subject for your Newsletter
before sending it!


